Restoration, 2003
Painting

January 10th, flatbed moving Ms. Moneypit for
painting.
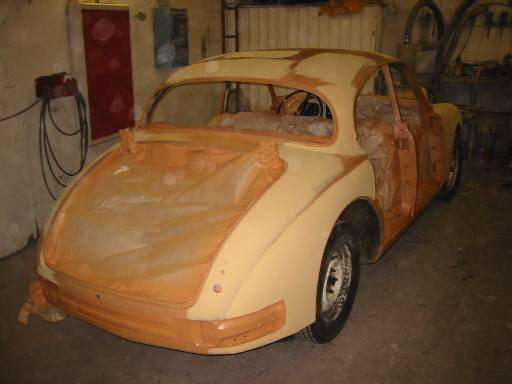
Rust proof primer (brown) sprayed and some
smoothing (yellow, spray filler) ongoing.

Doors and bonnets prepared separately.
Painted!
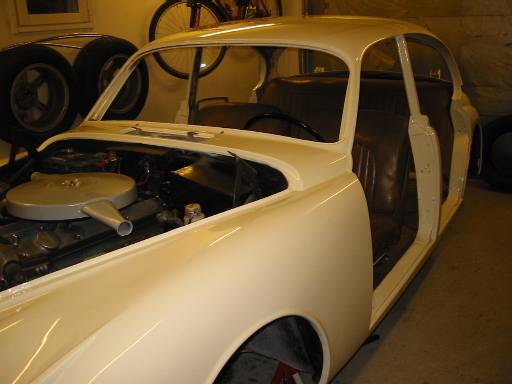
Jag is now painted. Color is Jaguar NDB, Old
English White, lighter shade. This picture does not show it quite correctly due
to fluoroscent lights in my garage and it's too dark and cold to take pictures
outside. 'Acid primer' + filler + primer + 2 layers of final color.
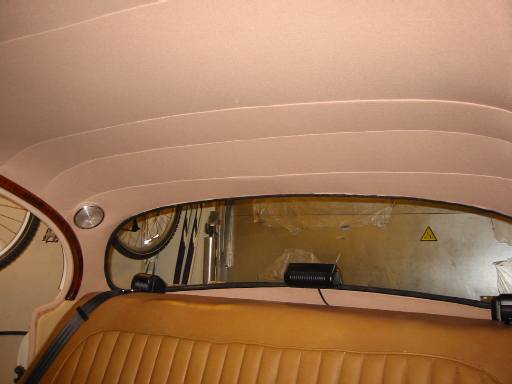
Headlining
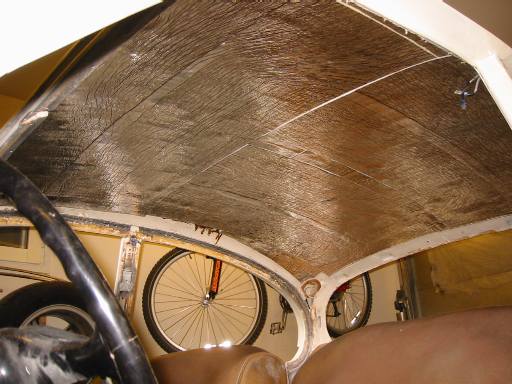
First step after repaint is to put new headlining
up. I ordered a new headlining from BAS UK. Tom Carson's instructions in Jag-lovers
helped to put it up. Lamps, lists and sun visors are still missing. One cm
insulation was put between the headlining and the roof. Lots of paper clips and
clamps needed when glueing the headliner to screen openings. 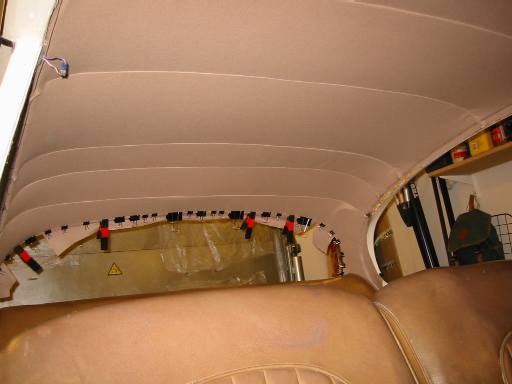
Windscreen
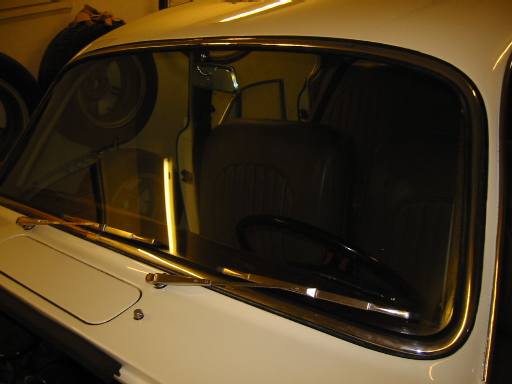
Installing the windscreen is the MOST difficult
task so far! I rather wash pitbull's teeth than do it again! Firstly, the new
rubber seal was 5cm/2inch too long, so however you put it, there is always an
extra pumb somewhere. And of course I didn't have the special tools mentioned in
Service Manual, so I used the rope technic, with my brother helping. Secondly,
putting the center rubber strip was even more difficult. Just like forcing 5mm
rubber into 0-1mm furrow sounds. I used dish washing liquid and all kind of
tools I could figure out. Finally it went there, mostly... And then the fun just
begins! Inserting the chrome strips is an awful job. I couldn't succeed in
sliding method someone suggested, so again I tried all imaginable tools to lift
the rubber edge over the chrome. Now it's there, mostly, there is still 10cm
part which I can't make correctly. Hopefully it doesn't show up too bad. It took
a week for me to install the windscreen. The rear screen took 10 minutes!
Door seals
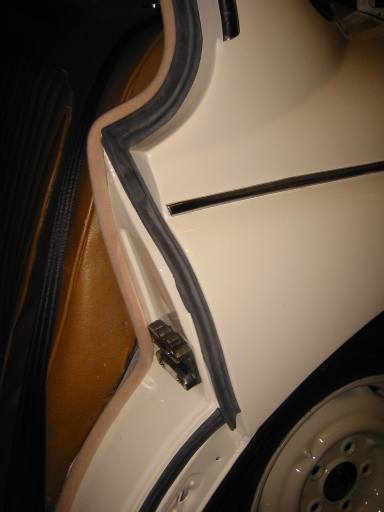
I installed door seals before putting doors back.
Much easier that way, specially in leading edges where door kind of hides the
seal. I used TESA 4965 tesafix double sided tape to fix the seals. Great stuff:
less messy than glues, no time limit when placing the seals and at least so far
it looks really sticky, I can't tear seals off with 2 finger grip. I don't know
where you can get this tape, I got mine from Tom Cummings couple a years ago
when he offered a batch for Jag-lovers saloons-listers. Remember to clean the
seals before taping, there is chalk like stuff on new seals which sticks to
nothing. I used sand paper and brake cleaner spray (yeah, maybe wrong stuff but
it was only thing present and easy to apply). Tom Carson's instruction and
pictures at http://www.jag-lovers.org/saloons/seals/
helped to sort out which way the seals go. You can also see the new furflex in
the picture. That one I glued into door edges plus stapled where
possible.
Rear bonnet seal
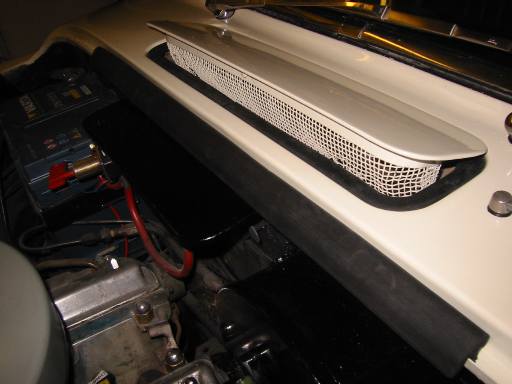
I couldn't find anywhere which way the rear bonnet
seal goes, so I figured this way. And you can also see the scuttle vent seal in
place. Like winsdscreen rubber, scuttle vent seal was also too big for it's
place. I cut some 1cm away, now it sits well. I wonder if my car has shrunk as
all seals are too big!
Stickers
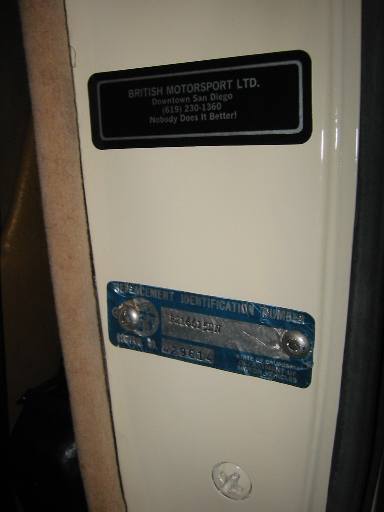
I glued couple old stickers back, to preserve some
history of the car. The top one is San Diego service garage some PO has used.
The lower one is California DMV vehicle identity sticker. It looks battered and
as such wouldn't be valid anymore, but it isn't valid in Finland anyway, we have
to have chassis stamped numbers. But it shows some history of the car for the
future generations.
On the road again
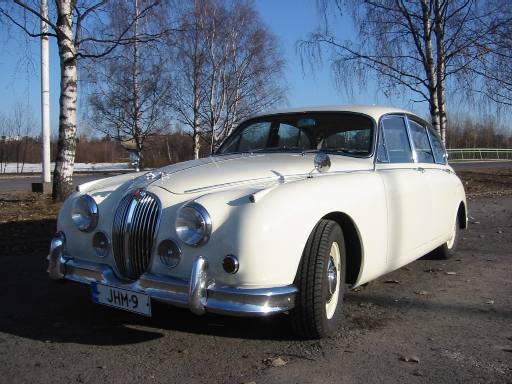
April 17th. All parts reinstalled after the
repaint and first drive on the spring streets of Oulu. Isn't she beautiful! 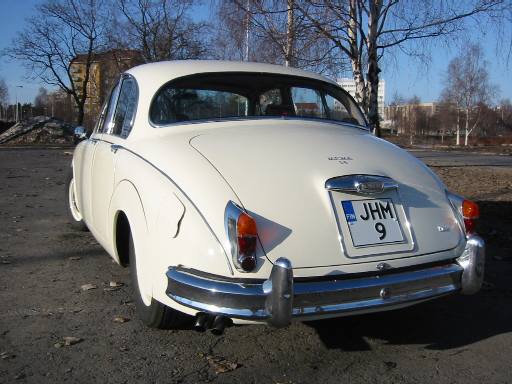
Replacement rear axle
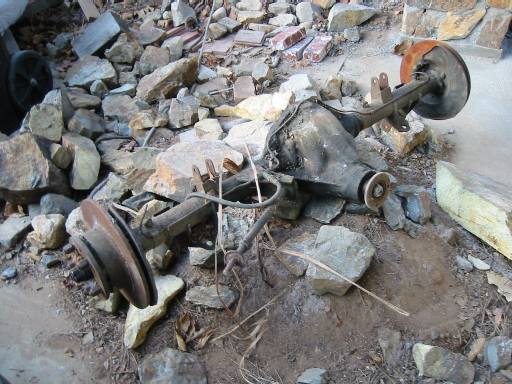 While on vacation in San Diego, I went to see Ken, an old Jaguar friend and Mk2
owner and he had an extra rear axle which he gave to me. As you may remember
from earlier pages, my car has wrong rear axle, too narrow. So I hope I can swap
this one into my car.
While on vacation in San Diego, I went to see Ken, an old Jaguar friend and Mk2
owner and he had an extra rear axle which he gave to me. As you may remember
from earlier pages, my car has wrong rear axle, too narrow. So I hope I can swap
this one into my car. 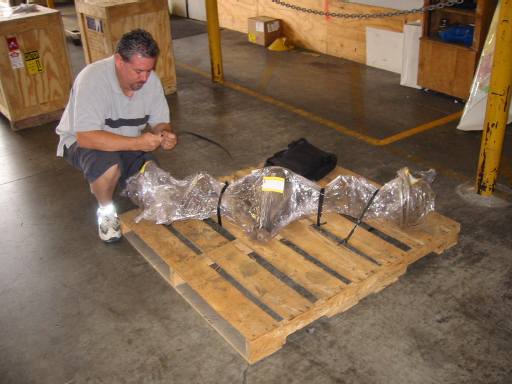 The axle was
of course too big and heavy as airplane luggage, so I shipped it to Finland. You
may be wondering was there any financial sense in getting the axle from the
other side of the world. Well, I have to answer with a question: Is there any
financial sense in this hobby at all? :) I was unable to find axle from Finland,
probably could have find one from UK, but I would had to travel there, find axle
and buy it and still ship it to Finland. So as expensive as shipping a free one
from USA.
The axle was
of course too big and heavy as airplane luggage, so I shipped it to Finland. You
may be wondering was there any financial sense in getting the axle from the
other side of the world. Well, I have to answer with a question: Is there any
financial sense in this hobby at all? :) I was unable to find axle from Finland,
probably could have find one from UK, but I would had to travel there, find axle
and buy it and still ship it to Finland. So as expensive as shipping a free one
from USA.
Last drive of the summer :)
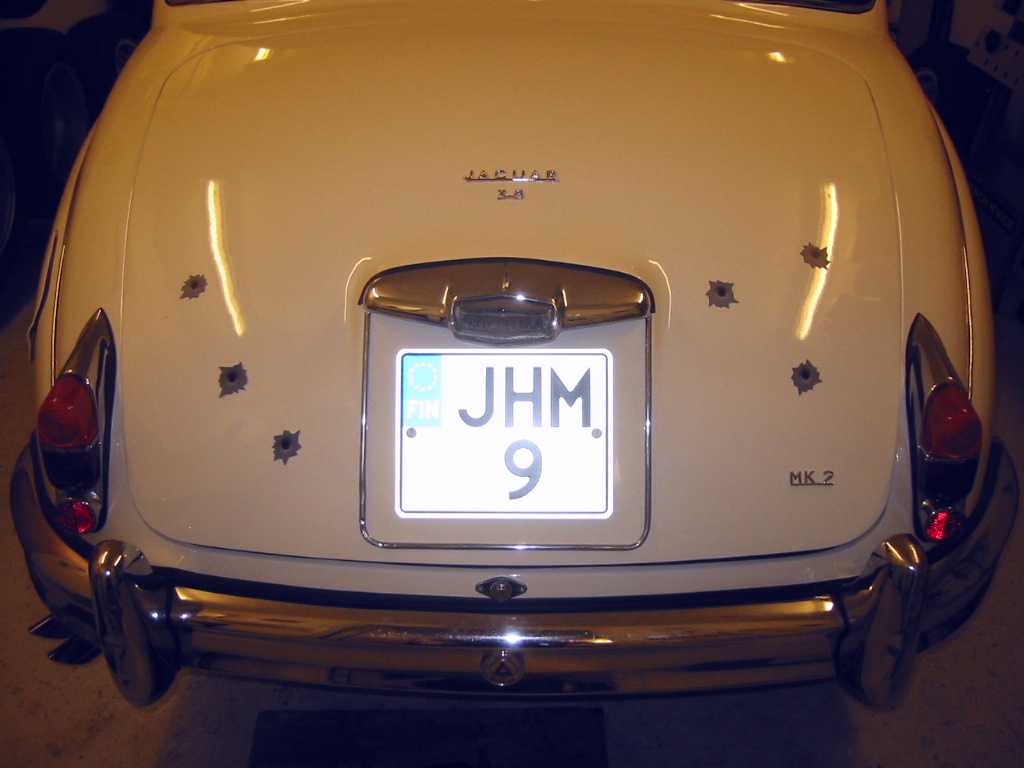 Last drive of the season was a bank robbery getaway, got some bullet holes into trunk in a chase. Just kidding! Don't send the Feds! Bullet hole magnets are an another purchase from August U.S. trip. As Mk2 was a popular bank robbery car on 60s, I think bullet holes suit the car fine. Well, I use those only sometimes, to shock neighbours.
Rear axle swap
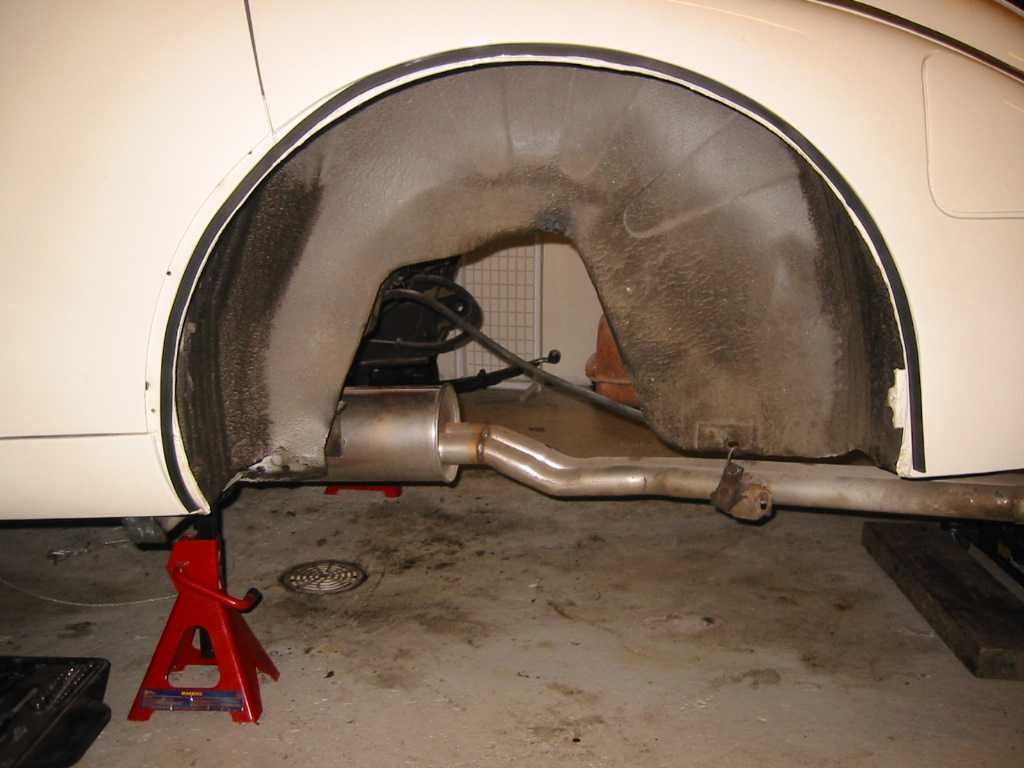 As always, my driving season ends in October and it's time for winter repairs. So I removed old rear axle. Couldn't get exhaust pipe joints open without breaking them, so I just lowered it and slide the axle out above it. Just like service manual says. In the picture, pipes are up in place (about..) again.